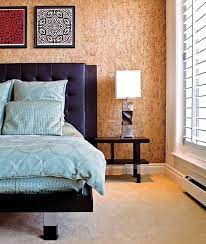
GUIDE COVERING IN CORK PANELS
Here are easy step-by-step instructions for creating a cork coating on a plasterboard surface with ready-made panels.
Preparation:
• Remove as much dust as possible from the plasterboard sheet with a brush or a damp cloth;
• Outline on a sheet of paper and then transfer approximately on the wall with a construction pencil, with the help of the measurements with a professional tape measure, a diagram of the positioning of the cork panels by calculating well dimensions and centimeters, in order to avoid installation errors. N.B: plan to create a track that leads the electric wires to the upper part of the wall;
• Wear protective gloves to prevent the glue from damaging the skin;
First stage:
• Prepare the elastic and water-repellent glue suitable for applying the cork panels on plasterboard surfaces. N.B: the adhesive must be able to resist the "natural" micro-movements that a plasterboard wall can undergo over time (especially due to thermal changes);
• Take a quantity of glue necessary to be spread on about one square meter of surface and place it on a notched trowel;
• Start from the lower area of the wall taking into account the possible presence of the skirting board;
• Spread everything on the first part of the wall making regular movements and making the glue uniform;
• Take the cork panels and position the first one starting from the bottom and following a precise pattern. N.B: usually the experts in the sector always start from the second row to ensure that, once everything is settled, the first row acts as a "repairer" by making small corrections on the joints and aligning the wall symmetrically;
• Press the panel firmly on the glue but without excessive thrusts so as not to cause displacement of the glue itself. N.B: if air bubbles form, press from the inside out to remove them;
• Carry out the same operations on the entire planned surface (N.B: for every 5/6 panels (or tiles) positioned, it is advisable to check the correct progress of the application with the level bubble);
Second phase:
• When applying pressure to the panels, remove, if necessary, the glue that comes out of the joints and is found to be in excess;
• To proceed in the areas around doors and windows, calculate the measurements well and, with the help of a sheet of paper, mark them on the panels;
• Proceed now with a professional cutter to cut trying to be as precise as possible;
Final phase
• After waiting for the adhesive to dry, check the stability of the panels and, once you are sure of the work done, it will be possible to finish the panels with a decorative border.
Tools and materials:
• High quality corrugated cardboard
• 4x4 all-over cover
• Brush
• Tore up
• Sheet of paper
• Construction pencil
• Measuring tape
• Gloves
• Protective mask
• Short pile microfiber roller
• Notched trowel
• Bubble level
• Glue
• Cork panels
ATTENTION:
Covering a plasterboard wall with cork panels is not difficult but you have to pay attention to some details:
• Preferably use plasterboard with a green colored sheet as it is designed to be applied in any type of environment including humid ones such as bathrooms or kitchens;
• Plan to create a track that leads the electrical wires to the upper part of the wall because then once the covering is completed it will no longer be possible;
• Make sure the cork panels are stable and do not move. To be sure, it is advisable to use special glues, in paste, more expensive than powder glues but much faster and easier to apply with a common notched trowel;
• Pay attention every 5/6 cork panels to the positioning of the same and do not wait for the adhesive to solidify because then it will no longer be possible to make changes to the wall.
ATTENTION:
The advice to get an optimal job is to contact a highly specialized company that can help you.
Did you need this information?
Share them with whoever you want on social networks.